Long Exposure Photography

I was introduced to long exposure photography in the autumn of 2009 whilst on a three day photographic workshop run by Lee Frost. Lee is a photographer, journalist, writer and leader of photographic workshops and tours. He used to edit and contribute to many of the popular photographic technique magazines and has written many books on the subject. The workshop that I took part in was a “Castles and Coast” tour of the Northumberland coastline. Lee introduced me to long exposure photography and I have been hooked ever since. Here are some of my images:-

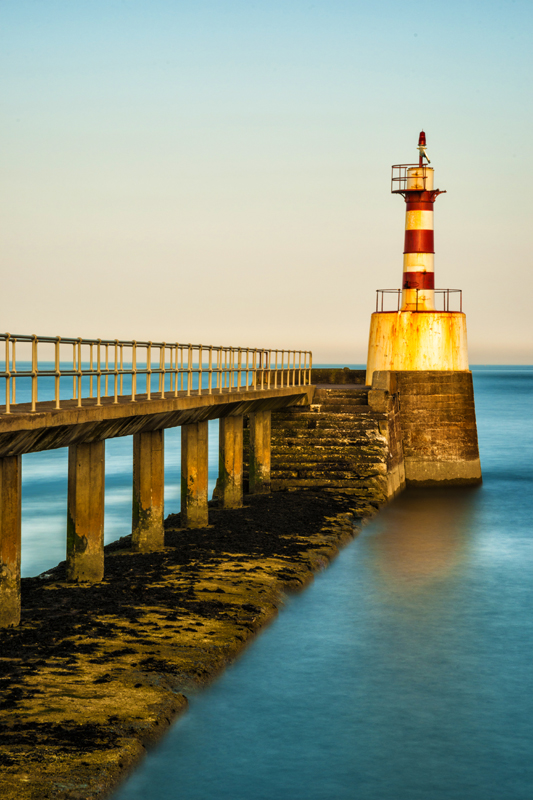
Amble Pier, Amble Northumberland basking in the early evening light.

This image is of Amble Pier and it was created in March 2011 on a subsequent visit to Northumberland.

My way to take long exposure landscape photographs during daytime!

There are many ways of capturing long exposure photographs depending on light levels, conditions and subject but they have some things in common:-

  • You will need a sturdy tripod.
  • A means of timing more than 30 seconds shutter speed – I have used a wrist watch but better ways are available such as remote shutter release buttons with timers.
  • Patience! – Your exposure time will be matched by a subsequent processing time.
  • A method of blocking light out of viewfinders because light can seep into the viewfinder during such a long exposure. Some cameras have a shutter over the viewfinder.
  • It can be very absorbing so make sure that you remain safe; sometimes you don’t notice the tide coming in and getting your feet wet – or worse, you get cut off from the shore!
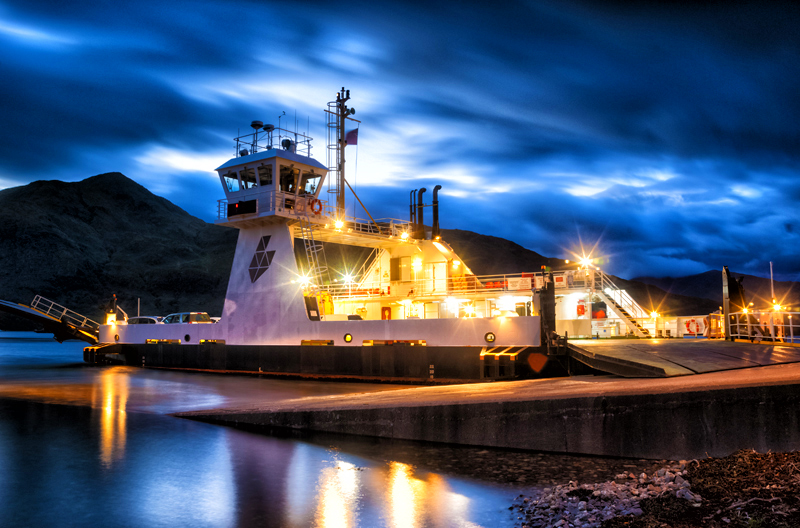
Corran Ferry, Corran Narrows, Loch Linnhe, Lochaber, Scotland at Dusk.

Depending on the effect that you wish to achieve will dictate how long in terms of shutter speed you will set – showing slight movement might only need large fractions of a second – 1/4 sec for example, but for the milky water that I favour or perhaps star trails will require much longer shutter speeds. The image of Amble pier had a shutter speed of about two minutes.
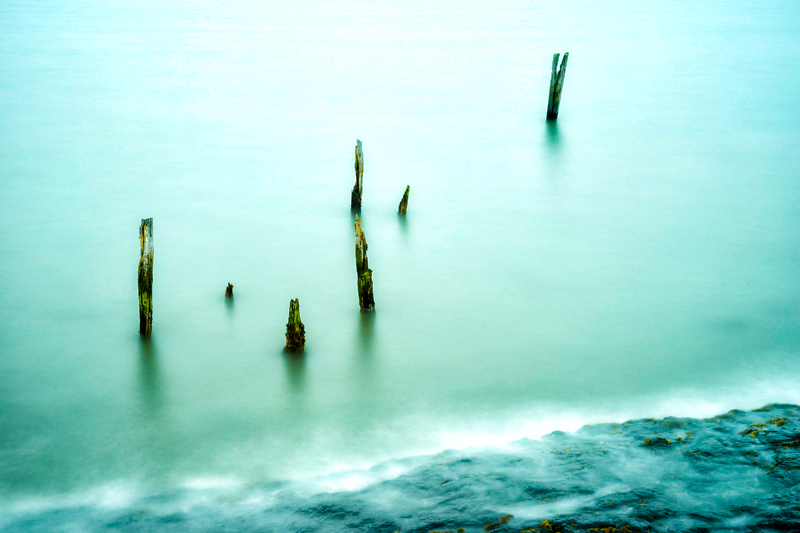
In order to correctly expose your image, you will need to use techniques to restrict the amount of light that gets in over time – by using a very small aperture (or large number f-stop value). This can be good for depth of field in landscape photographs such as ‘Amble Pier’. For this image the f-stop was between f22 and f28. It is worth remembering that high f-stops such as this can cause chromatic aberation – green and purple (in many cases) along lines in your image due to how much the light is bent to get through the aperture – use with caution, particularly over f16. I got away with it here and indeed, because of the combination of depth of field and limiting the light into my camera, I often use f22 to f32. If you want a limited depth of field, of course you would choose a much smaller f-stop (larger aperture) – f4 for example.
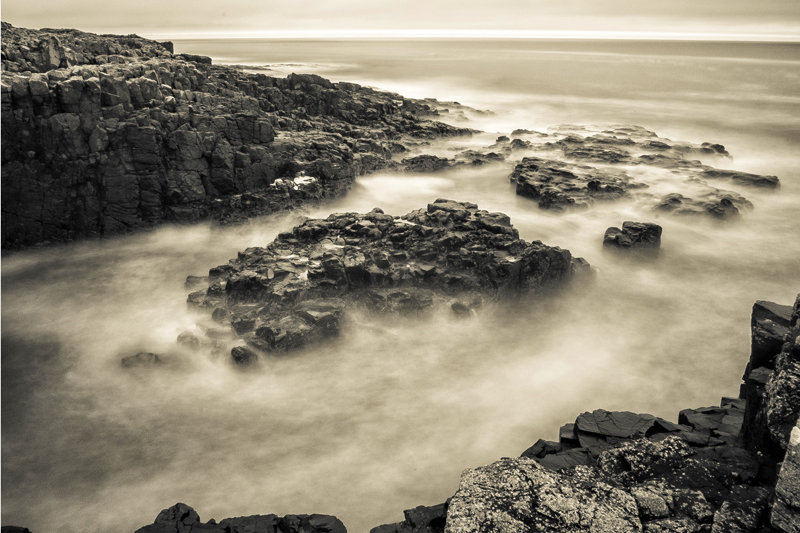
Rocks near Craster, Northumberland.

Another thing that you can adjust on Digital cameras is ‘iso’. This adjusts how sensitive to light your sensor is. iso 50 is ‘quite insensitive’ – it takes a relatively large amount of light to register on the sensor, iso 100 is more sensitve to light but still gives great quality if there is sufficient light. Iso 3200 is very sensitive – great for low light conditions but it creates a lot more noise. The measurement of iso came from the days of film photography. There are a lot of people who still use film today but you have to choose the sensitivity required before loading a new roll of film. I started off using film and a roll of Fuji Velvia with an iso of 50 gave photographs with very fine grain, while Ilford Delta 3200 (iso 3200) is very grainy but great in low light conditions as it is very sensitive. For long exposures I use iso 100 for great quality and limited sensitivity – remember, we are trying to limit the light over time to capture movement. With digital cameras, you can change the iso on a shot by shot basis.
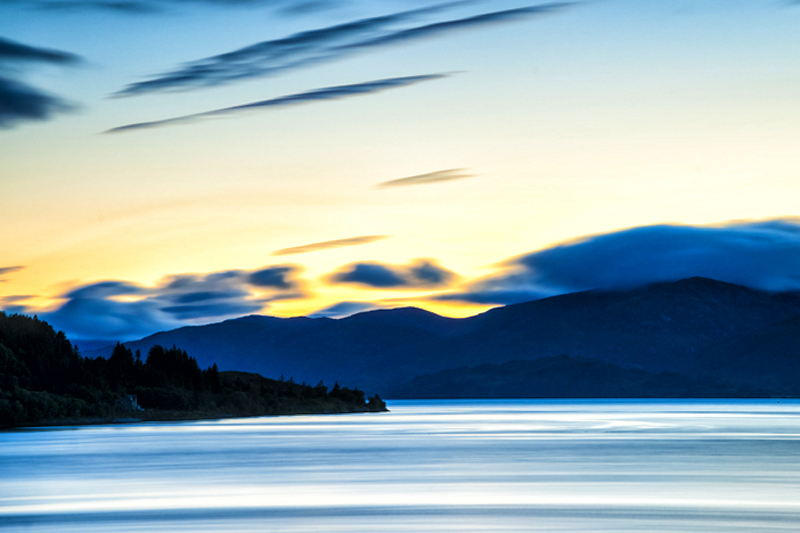
Ballachulish just after sunset in early September 2015. Looking out to where Loch Leven joins Loch Linnhe near Glencoe in the Scottish Highlands.

Correct exposure is achieved with the right combination of aperture, shutter speed, iso and light levels. Sometimes, you have optimised the shutter speed, iso and the aperture but the ambient light is far too bright, so the final step is to limit the light hitting your sensor or film is to use a strong Neutral Density (ND) filter. A ‘two stop’ ND filter will let half of the amount of light in to the sensor compared to no filter for any given combination of shutter speed, aperture and iso calculated for available light levels; a three stop ND filter – a third of the light. For a long exposure photograph like ‘Amble Pier’, a 10 stop ND Filter was used – that is a tenth of the light than would have been allowed in without the filter gets recorded by the sensor (or film).
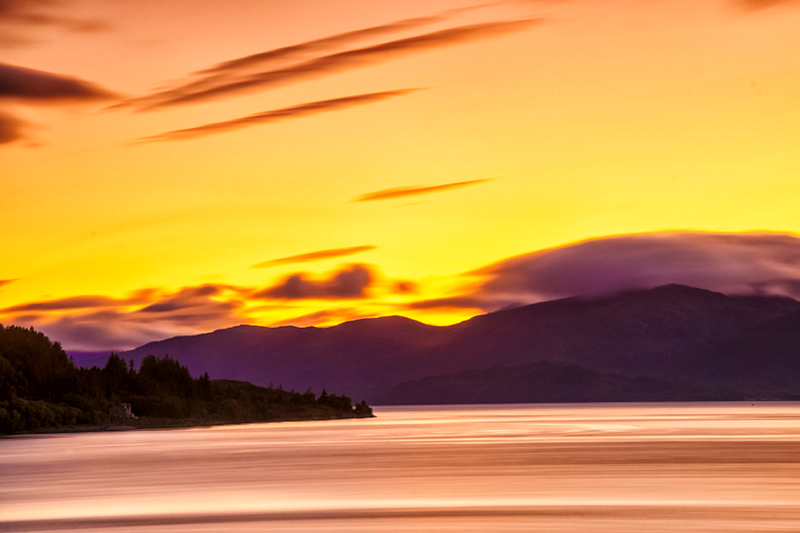
Ballachulish just after sunset in early September 2015. Looking out to where Loch Leven joins Loch Linnhe near Glencoe in the Scottish Highlands.

I started off with a screw on 10 stop ND filter but I later graduated to a Lee Filters Big Stopper for quality and ease of use – I could focus and then slide the Big Stopper into place before taking the shot. With the screw in version, I sometimes disturbed the focus by screwing on the ND filter. I also have a variable density ND filter – anything up to 6 stops, which can come in handy sometimes.
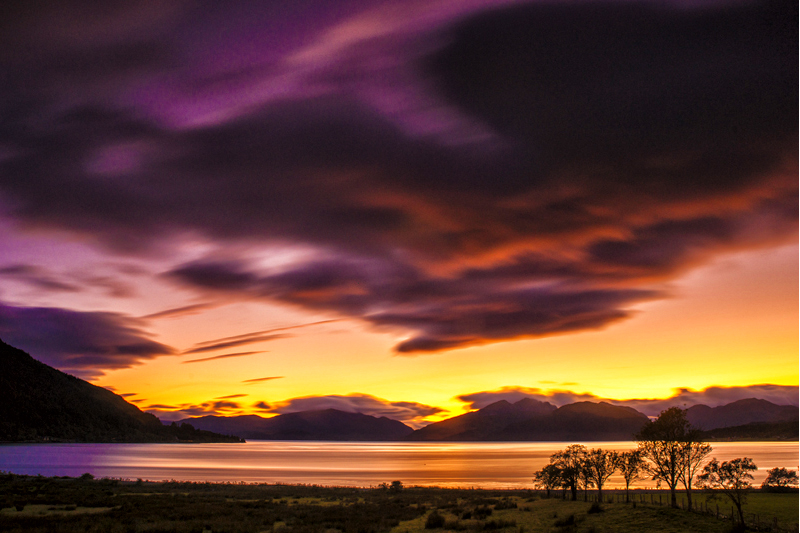
Ballachulish just after sunset in early September 2015. Looking out to where Loch Leven joins Loch Linnhe near Glencoe in the Scottish Highlands.

My settings for most of these images:-

  • Interesting view with moving elements like water and/or clouds drifting across the sky.
  • Safe environment.
  • Manual Aperture, Shutter speed – on ‘Bulb’ – allows shutter speed of more than 30 seconds.
  • Aperture f22 to f32 – depending on conditions with a preference for f22 if I can.
  • Sturdy tripod.
  • 10 stop ND filter (mostly).
  • Focus camera lens – for landscapes, usually a third onto the frame – hyperfocal focusing.
  • Unlimited shutter speed.
  • Electronic cable shutter release with lock function.
  • Wrist watch (or timer Electronic cable or wireless shutter release) to hold the shutter open for specified time.
  • Cover for viewfinder.
  • Once focused, slide 10 stop ND filter into place.

There are ways of calculating the required shutter open time but I tend to start off with an exposure of 2 mins in normal daytime light levels, and then using the camera’s histogram, adjust by increasing or decreasing the exposure from there. If the exposure is not good, I retake after adjustment (and continue until I am happy). If I am happy with my image, I will perhaps choose a different angle and re-shoot – with more of an idea of light levels and exposure settings.

Take plenty of batteries!

One final note; when I started this caper, I was using a DSLR with a mirror. You get a black screen on the back of your camera once you have added the 10 stop ND filter. I now have a mirrorless ‘DSLR’, now I can see a dimmed version of the image even though I have the 10 stop ND attached – I find that reassuring for a last check of the composition before I release the shutter to create the image.

I like these images but I am more than a bit biased as they are ‘like my babies’. Please write to me in the comments with your thoughts on my images, my technique or any other related feedback. All comments welcome and appreciated.

Mobile Phone Photographs.

Have you got a smart mobile phone with a camera? Good. Do you take photographs with it? Do you try to take artistic photographs with it as opposed to “record shots” (not that there is anything wrong with doing that – millions of us do it)? So do I and I have recently been playing with some of the free and paid photo apps that are available for Android phones on Google Play. (Many of the apps are available for iPhones through the usual channels for iPhone apps) I am having a wonderful time and the experience has increased my creativity – whether my efforts are any good or not remains to be seen but I am feeling more creative.

If you are trying to create something from your phone pictures you need to use some apps because with the best will in the world 5,10 or even 13 Megapixels from the tiny sized sensor on your phone is not going to give the same quality as the equivalent Pixel count on a Digital Slr or bridge camera due to technical limitations of physically small sensors – the apps help you to overcome those limitations by “covering up” digital noise and other aberrations 😉

I have tried several apps, some I have kept and some I wasn’t so keen on so deleted them. The ones that I use most often are Snap Seed – great for general editing and it has several creative effects, Super Photo – I started off with the free version but there are quite a few adverts and some of the best effects are unavailable unless you upgrade to the paid version (the paid version is about £2.50) which I did – the effects are much more pronounced and I will go to SuperPhoto when I want something arty – you cannot really make adjustments like cropping, brightness or saturation but it is good for effects, PicsArt which is good for making adjustments and it has some great effects – the thing that makes me use this one mostly is its ability to make your picture format square (for Instagram) without losing a bit of your picture, it does it by expanding your rectangular photo into a square and filling the extra bits with blur or colours – your choice. The first app that I downloaded was Photoshop express; I think that they call it something else now but it is free and useful. It has some good effects and you can edit cropping, brightness, saturation and a whole load of other things, and it is from Adobe. I have also downloaded Photo Lab (free), Photo Editor (free) and PicShop lite (free). There were others that I tried and deleted because they were too much like apps that I already had or they were very clunky and kept crashing. You just have to try a few and see how you get on with them and then if you like them, consider investing in the paid version if it is worth you while.

Here are a few of the photographs that I have taken On my phone and then processed with one or more of the apps:-

The majority of these have been through Snapseed, SuperPhoto or both –  the great thing is you can then send them directly to Instagram (which also has some good tools build in) , Facebook, Pinterest or to more or less any place that you have an account that you might want to share your photos to without having to bother with your computer.

Next I thought it would be a jolly wheeze to download photos from other cameras onto my phone with a view to using the same effects on them. Here are some of my efforts:-

As you can see I have managed to utilise many different effect onto what were “straight” photographs – effects such as “Banksy” (SuperPhoto), Photo in an old book and face in coffee cup (PhotoLab), Conte camera girl (superPhoto), And a couple of “Pop art” inspired shots (again SuperPhoto).

A word of caution though, often these apps will reduce the resolution of your full resolution photographs – even ones that say that they don’t – I had this problem with SuperPhoto, I wanted to use some of the new creations for printing and found that they were too small – I subsequently found that SuperPhoto do an App (paid – about £3.50) for Windows, so I bought that and I am a happy camper again. Another solution is to use a resizing Program on your computer, I use the one that comes with OnOne Phot0 10.

I had been curious about photography using my phone for some time but I was particularly inspired to indulge in after seeing a presentation at my local camera club by Gerry Coe. He is a Northern Irish photography expert who not content with Becoming a Fellow of the British Institute of Professional Photographers (FBIPP), a Fellow of the Royal Photographic Society, a Fellow of the Master Photographers Association and a Fellow of the Society of Wedding and Portrait Photographers, went on to gain a second FBIPP for his iPhone photography. His iPhone photography site is:-

Gerry Coe iPhone Photos

If you want to have a look at my Instagram stuff – search for paulcullenphoto

Gerrys instagram account is coeiphoneart

Why don’t you give it a try?

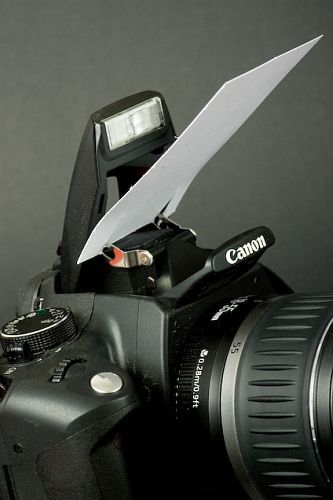
One way to avoid harsh contrast and red eye with on camera flash.

If you are anything like me you will dislike the harsh contrast, red-eye and blown out effect of on camera flash – it is never a good effect. In the absence of sufficient daylight it is often necessary to use artificial light and off-camera illumination is best. It is not always practical to carry the required kit but there is an inexpensive (and easy to carry) way to make the best of what you have got.

This is a technique that I have often used when photographing things for ebay but it can be used in many situations. It does depend on having a white ceiling above* you (other colours will create a colour cast of that colour) but it enables you to use that ceiling to create a softer and more pleasing light for your subject; the solution is portable and won’t break the bank. Personally, I use an C5 white envelope which gives even more diffusion but this solution is even more portable:-

601d62b9939b840d384c0050a7bdca60

It works by deflecting and slightly diffusing the light instead of it going directly ahead. The light is then reflected and further diffused by the ceiling. The diffusion and the fact that the light follows the same path (downwards) that we are used to from sunlight, makes the lighting more pleasing to the eye. You also avoid lots of light hitting the back of your portrait subjects eyes (red-eye).

*If you were to turn the camera through 90 degrees (portrait format) you would require a white wall (or other white reflector) to the side of the camera that the on-camera flash sits, in order to “bounce” the light back onto your subject in the same way that you used the ceiling.

This technique is a compromise but will vastly improve your results over direct on-camera flash. Happy snapping!

(Photo source – Pinterest, Photographer unknown)

Photo project – three of a kind.

The camera club that I belong to Beeston Camera Club is always on the lookout for new and interesting ways in which to engage the members in activities as well as turn up for the great variety of interesting and varied speakers which have been hand-picked from fine photographers from near and far. One such activity was to create a photo project which was to be constructed from three separate photographs. We were sent some examples but the brief was very open (and essentially open to interpretation). The resulting works were presented to the members at a “members evening” last Thursday, the 11th February 2016. Several members produced works for the event. The result was wonderfully diverse in terms of interpretation. I contributed five works and had great fun doing them – here they are:-

Triptych 1

This was my first attempt. It is made up of the same image but in the three instances the image was given a different treatment in Photoshop with Nik Color Efex pro  4 and Nik Silver Efex pro 2 plugins.

Triptych Tulips

Next, I decided to use some square images that I had produced. This time it is three separate images/compositions and they were given different treatments in Photoshop and Nik Plugins. It started as just the three squares but it looked a bit long and thin so I extended the canvas above and below and coloured the extensions black. I think that it looks quite effective, but then I don’t let ’em out until I am happy with them! I was only going to enter one and this was my choice, but was encouraged to send more, so I sent my first work together with three further works after contributing this one.

Saint Emilion, one of the great Bordeaux wine regions and a beautiful place to visit. Saint Emilion is found to the North-east side of the City of Bordeaux, Aquitaine, France.

Saint Emilion, one of the great Bordeaux wine regions and a beautiful place to visit. Saint Emilion is found to the North-east side of the City of Bordeaux, Aquitaine, France.

I thought of a wine theme with this one. The larger background image is of Saint Emilion, the very famous wine region – part of the Larger Bordeaux region in Aquitaine, France. I have been there several times now and it is always a pleasure. It is a beautiful village, even if you are not interested in wine you will enjoy a visit. The grapes on the vine was actually taken outside of Bordeaux (not far) in a village called Villeneurve de Duras in the Cotes de Duras wine area, not far from Bergerac – it is one of my best sellers on Shutterstock and has sold all over the world. (I did take some photographs in the centre of St. Emilion and some of those have sold too). The third photograph was a still life photograph that I made and then put it through Smart Photo software from Anthropics to give it an older look.


A mixture of Oxalis, Kerria and Clover on a textured background.

A mixture of Oxalis, Kerria and Clover on a textured background.

A while ago I went out and picked some flowers – the Oxalis and the Keria grow in my garden – the clover from the Local nature reserve and I photographed them on a white high-key background in a light tent. The textured background was the back of a red granite grave stone. I changed the blending properties on that layer and altered the opacity (and probably the brightness). The flowers were placed onto the background by copy and pasting them.

Turbulence in Water - Abstract

Turbulence in Water – Abstract

Finally, the theme for this one was waterfalls. The background image was an abstract of flowing water from Aira force, approachable from the north side of Ullswater, Cumbria. Aira Force is a National Trust managed series of lots of waterfalls. The image in portrait format with the bridge is the first substantial waterfall that you come across as you ascend Aira Force – I would have been happy with just this one, but there are more falls – lots more culminating in a huge wide torrent at the top. The other photograph was taken at Watersmeet near Lynton and Lynmouth, Devon and is within the Exmoor National park.

I am sure that I haven’t done my last three in one composition; I enjoyed myself so much with this photography project that I am keen to explore more possibilities – why don’t you give it a try?

Paul Cullen Portraits

Paul Cullen Portraits by paul2210
Paul Cullen Portraits, a photo by paul2210 on Flickr.

This is Caitlin and her mum Helen. I was asked by Helen – another friend and ex-colleague, to take photographs to celebrate Caitlin’s first birthday. The child was teething, hence, getting stuck into Helen’s purse with her emerging teeth.