I said in my last post that I would post some of my infrared photographs that I have processed as colour. Here is a selection, firstly from the camera that had been converted with a 720 nm filter over the sensor, then from the full-spectrum camera with a selection of filters fittted to the front of the lens.
Canon 350D – Converted Camera:-
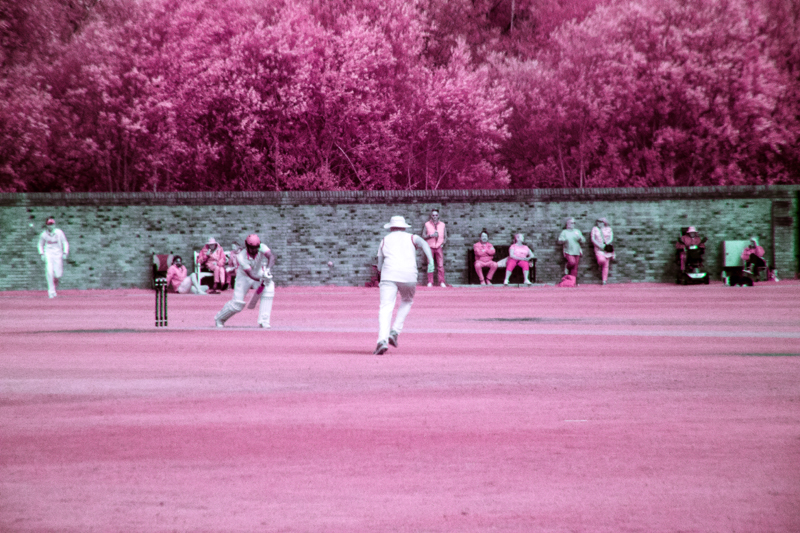
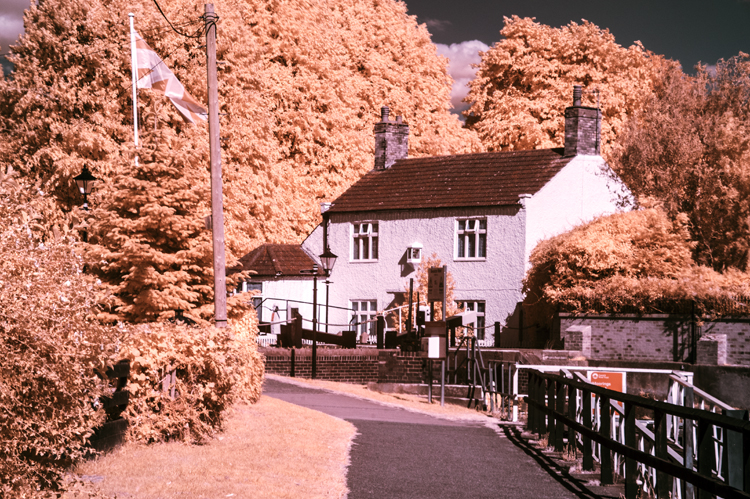
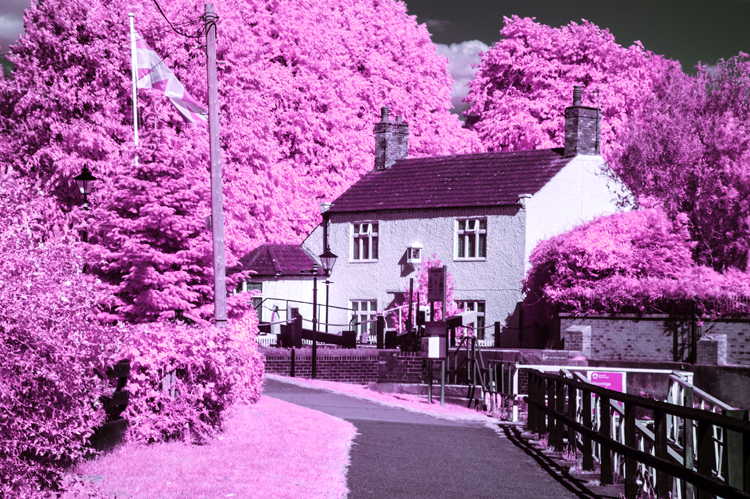
The above two images are the same original image. The first one was processed using channel mixing and layers and the second one shows what happens when you then adjust the hue – in this case plus 163.
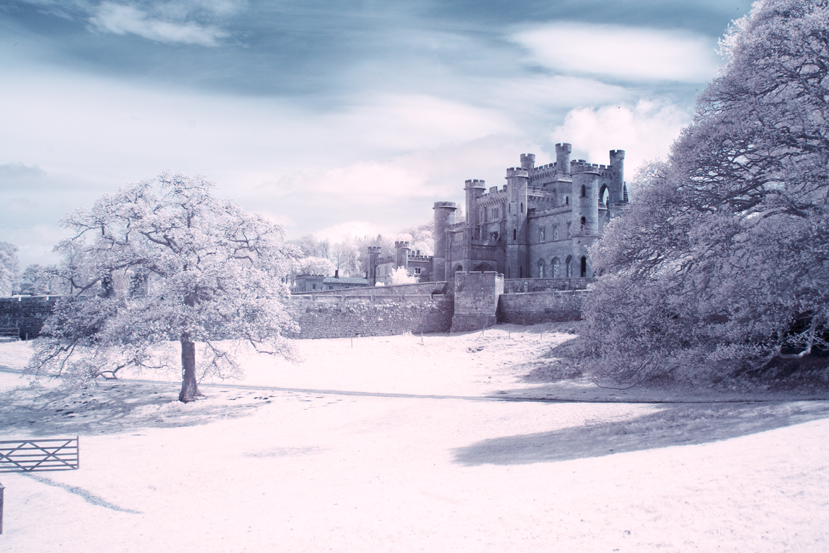
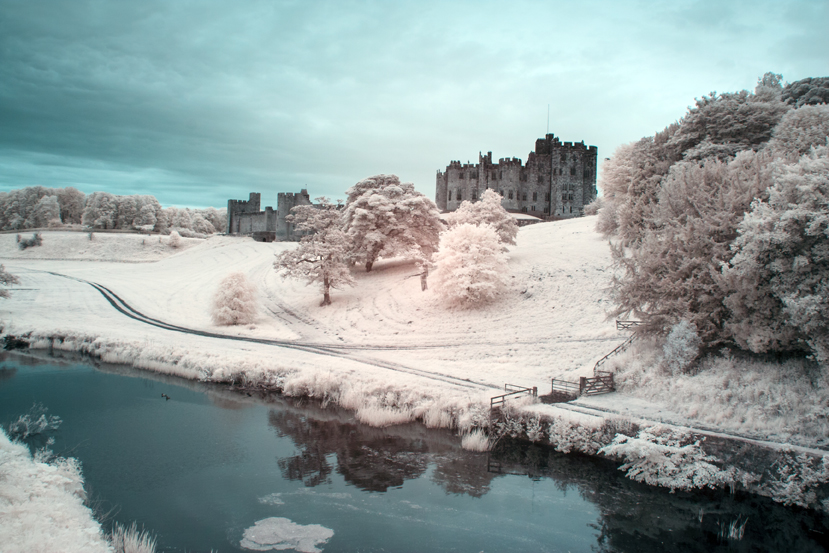
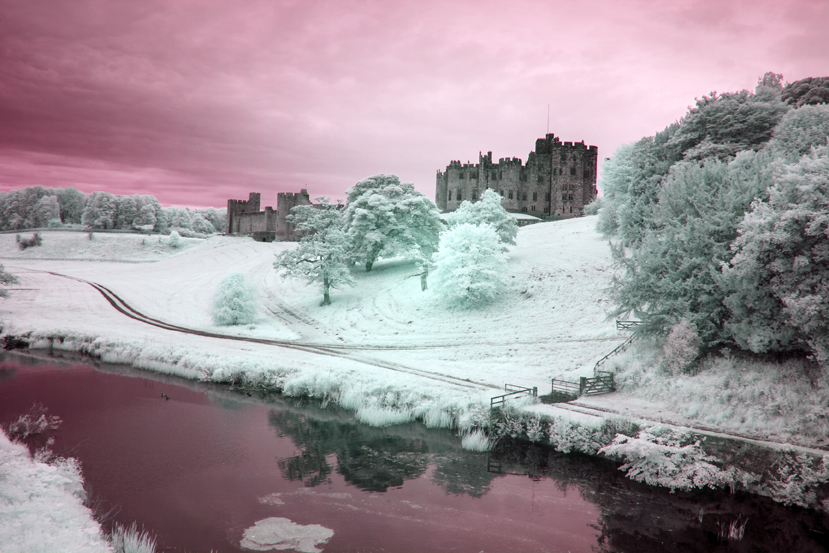
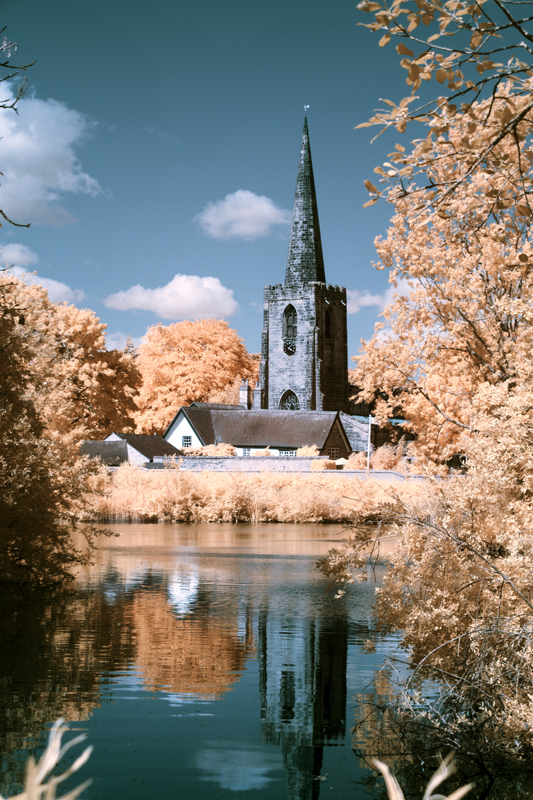
I have done the same with the next two images of Alnwick castle – first the one without hue adjustment and the second one with a positive adjustment of about the same magnitude, although, a small negative or positive adjustment can make quite a difference and I would urge you to experiment.
Full Spectrum Camera with Variable Filter.
530 nm:-
Hue minus 50No Hue Adjustment.Hue minus 50No Hue AdjustmentHue +/- 180
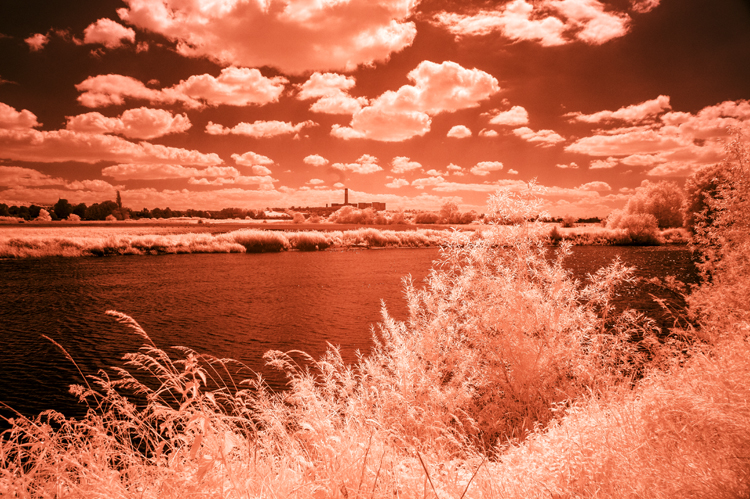
Filter set to 640 nm (approx):-
No Hue AdjustmentNo Hue AdjustmentHue minus 28
You will notice that there is more of a red tone predominately in the originals – turning the trees orange instead of yellow as with the 530 nm filtration.
750 nm:-
No hue adjustmentConverted to Black and White
With the 750 nm filter there was not much scope for hue adjustment because very little visible light was getting in, mostly infrared. I could have added a bit more contrast to the monochrome image but there was little hope of getting much of value with the channel mixed version.
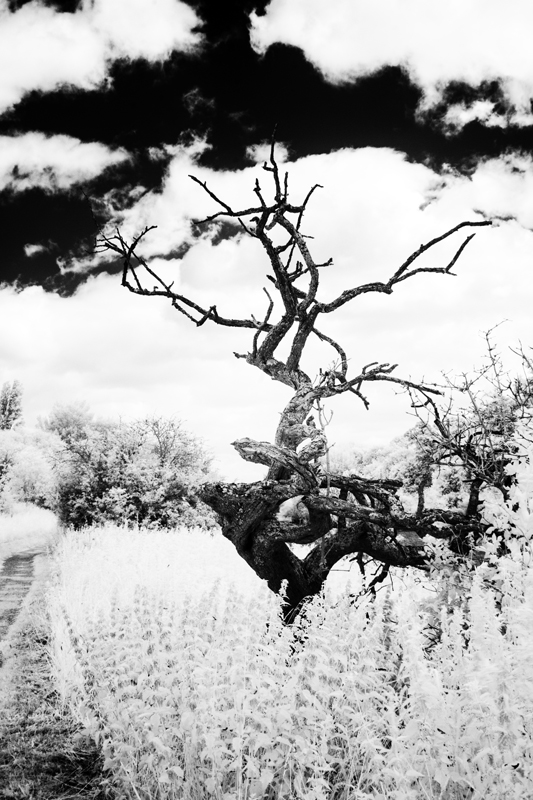
850 nm Filter:-
Channel MixedConverted to Black & White
As with the 750 nm filter there was no scope for bright and colourful images but with the mono conversion, I got a beautifully contrasty image.
It occurs to me that to get coloured “infrared images” we have to let a bit of visible light in too and experiment with the image using a myriad of adjustments using channel mixing, layers, curves to mention a few, to suit your individual taste. So far, I have only given you the basic version of channel mixing. Some mixes involve adjusting the green slider, having different mixtures of the red and blue channels or a combination of all these. Even then you are just scratching the surface. I mentioned Rob Shea a few posts ago, he provides a whole range of Camera Profiles for different cameras. He also provides a wide selection of Photoshop Actions which can be imported into Photoshop – instead of making the adjustments of Channel Mixing, Layers and other adjustments, you click on an “Action” and the effect of several adjustments are applied in one click. Follow these links for more:-
There are full instructions on his site on how to install these resources andyou can have them and much more for the price of giving him your email address. I have them and in terms of the Photoshop Actions, a good way of finding out about the many adjustments that you can try out and provide a quick way of finding out which adjustments and effect you like.
I must say at this juncture that I have no connection to Rob Shea except I follow him on Instagram.
That is all for today folks. I hope that you will be back soon.
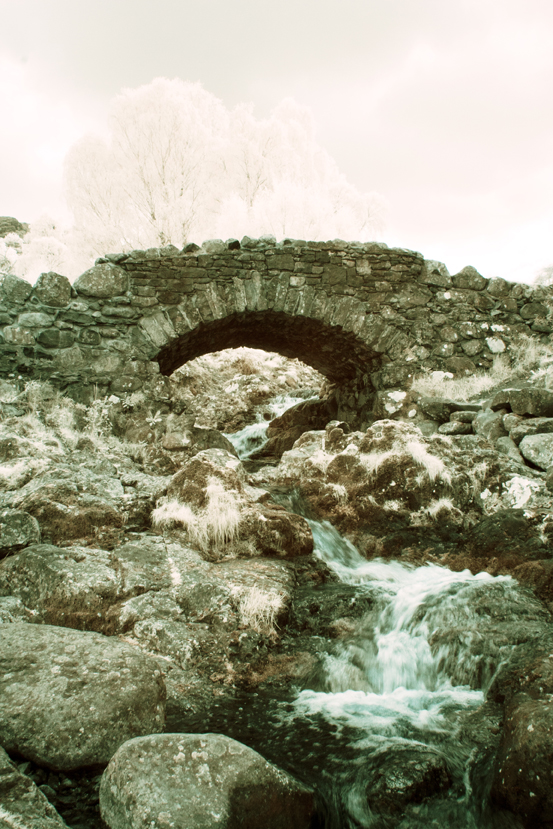
Today, I’m not going to talk about which make or model of camera to use for infrared photography but instead talk mostly about conversion types for infrared photography (or using an unconverted camera) and my variable experience of the different pros and cons of each.
I started out with a Canon 350D (or Rebel XL) DSLR in which the filter over the sensor, which most digital cameras have, to limit the light falling onto the sensor to the visible spectrum (380 nm to 790 nm), had been removed and replaced with a filter which limits the light that falls onto the the sensor to around 720 nm and above in the near-infrared spectrum – in the case of infrared photography, we are usually interested in the range 700 nm to 900 nm. This is a permanent change, you create a custom white balance for your camera and off you go taking photographs. I always recorded .TIFF files and processed them in lightroom. In the early days, I processed them as black and white, usually by turning down the saturation and increasing the contrast – there are better ways of doing this but perhaps I’ll keep that for another post. Recently, I have gone back and re-edited some of these images as described in my previous post using Lightroom and Photoshop – channel mixing, layers, curves after creating a Camera Profile. I was really quite pleased with the results. I thought that they were “special and different” and perhaps some of them were of commercial value but the file sizes were a little small (10 Megapixels camera) for my uses so I went on the hunt for a converted camera with a higher pixel count, what I discovered was a Full-Spectrum camera (at over 20 megapixels).
A full spectrum camera has had the filter removed that limits the light hitting the sensor to the visible range and instead, a clear filter is placed over the sensor – or in some cases, no clear filter is used. This camera can “see” everything from ultra-violet to well into the near-infrared spectrum. The filter that was removed also stops the blue end of the spectrum. It can be used without additional filters but tends to render as very blue once the custom white balance is set. To record our “infrared images” we need to put a filter over or under the lens to choose which frequencies of light we want to record. This is where the fun begins because this camera has much more flexibility but you have to buy filters to take advantage of that.
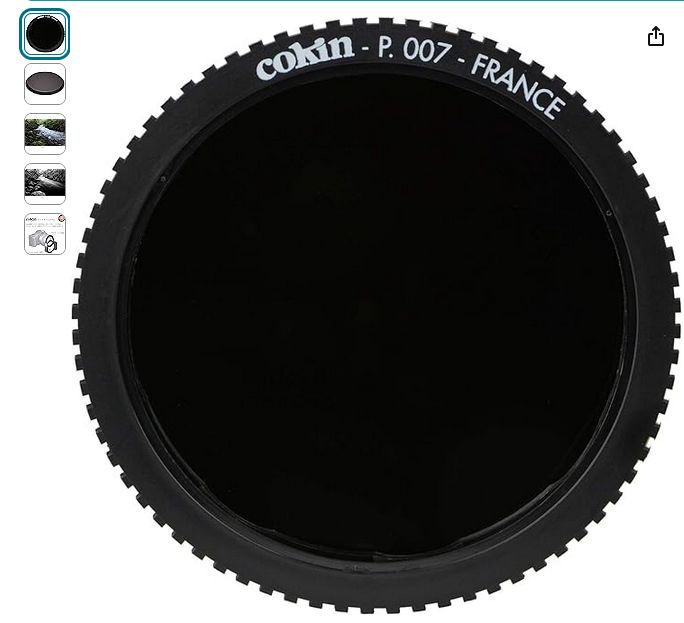
I first bought a Cokin P007 Infrared 720 nm (89 B) round filter. This filter is used in front of the lens as part of the Cokin P series filter system which I already owned.
As you might suspect, it filters the light entering the camera in simple terms, to 720 nm and above. It is a very dark filter which makes focusing difficult with a traditional DSLR with a mirror – hot tip – mirrorless cameras don’t have this problem as you are seeing a digital image in your viewfinder from the sensor not a reflection in a mirror. 720 nm is the popular choice for infrared, in fact it is difficult to get other frequencies if you are on a budget. Here are some examples of how my early efforts of using this filter turned out after processing them by channel mixing and layers adjustments that I described in my previous post.
And here is the same image after I applied a hue adjustment of – 60
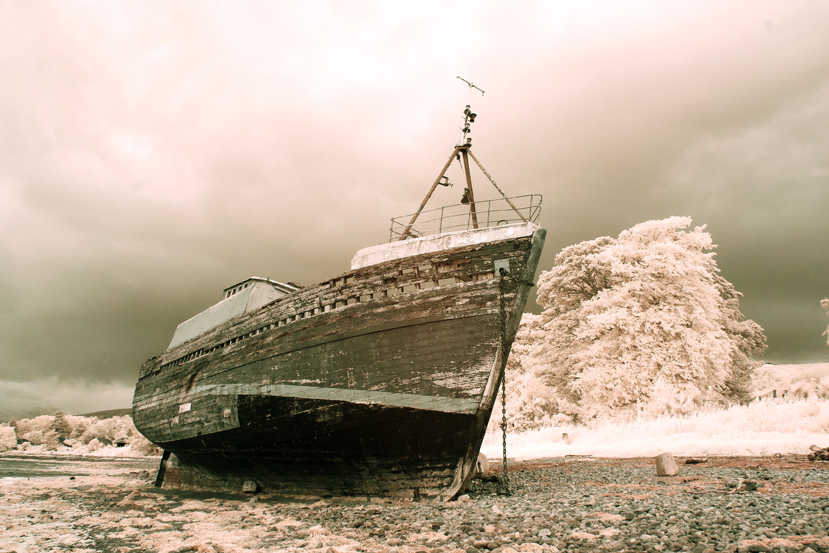
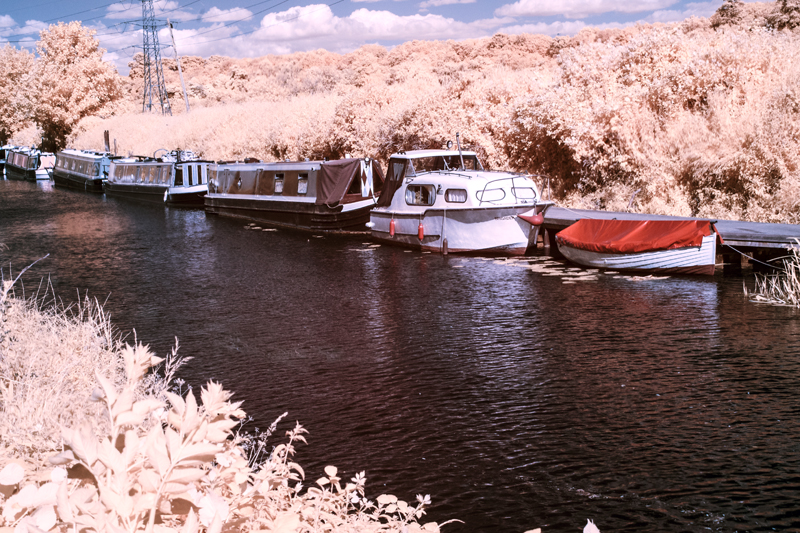
The people from whom I bought the full spectrum camera showed an example of an image where the filter used was a Cokin Orange filter. I already had one of those from my old black and white film days, so I thought that I might give it a try instead of the 720 nm filter (the orange filter gives filtration of about 590 nm. Here are my results:-
At around 590 to 625 nm, quite a lot of the visible range gets recorded and so lends itself to lots of experiments with the sliders and I do like to experiment and so, it seems, do many other exponents of coloured infrared photography – it is really a bit of a mixture between infrared and the visible spectrum photography, but it does give interesting results.
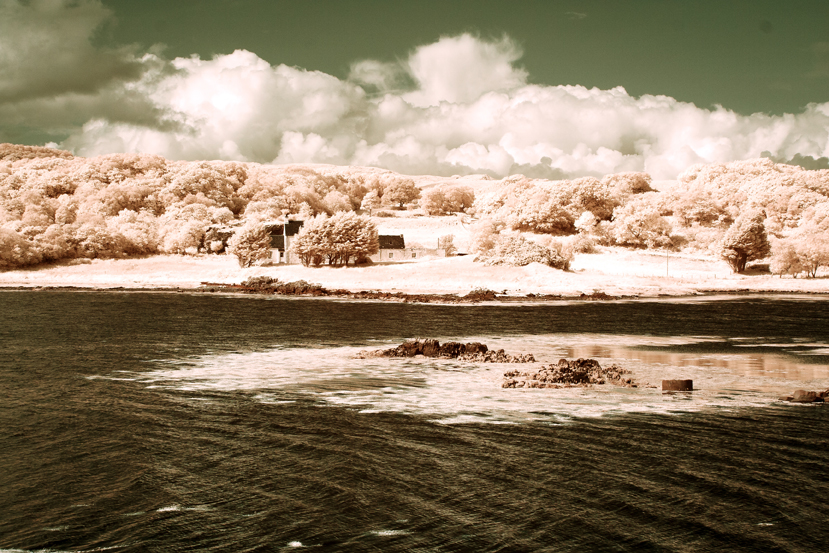
There are manufacturers who produce variable frequency infrared filters. One such filter is the Hersmay Infrared 6 in 1 adjustable Infrared pass filter – 530 nm to 750 nm. Basically, it screws onto the front of the lens and then you twist the filter to increase or decrease the minimum wavelength (I am using frequency and wavelength interchangeably). Here is the filter which I bought on Amazon at a fairly reasonable price:-
It is very useful but I did find the images quite soft, especially at the 750 nm end – it is a compromise but matters improve at low sensor sensitivity (iso 100). Some of the images created using this filter:-
530 nm530 nm with hue 180 – that is plus or minus.530 nm530 nm – hue minus 60640 nm640 nm hue minus 67640 nm hue plus 40.750 nm750 nm hue plus 22
You will see from these examples that there is more variation on colour in the lower fregencies of light as more of the visible spectrum of light is recorded by the sensor. Filters are available in the range of 850 nm to 900 nm but images created with them will almost all be converted to black and white images, indeed you could argue that even 750 nm would probably be better as bleack and white. These higher frequencies produce the most crisp and contrasty black and white images of all so it’s “horses for courses!”
You can also get filters which fit snugly inside your camera, behind the lens but in front of the sensor. They are available in a range of frequencies – I believe that they are very good quality but also very expensive. Do a search for Kolari infrared filters to find out more (Kolari also do a range of filters for in front of the lens too).
Finally, you could put an infrared filter such as the Cokin P007 720 nm and take photographs. I tried it but exposure was a problem due to the filter which favours the visible spectrum. With long exposures you will get infrared images but use a tripod! Many people do this but I found the very long exposures limiting.
So:-
Converted cameras with dedicated filter.
Pros:-
No need to buy extra filters.
Normal exposure times
Excellent quality images
No need to carry lots of equipment
Cons:-
Limited to one frequency
Less flexible option
Camera is a “one-trick-pony”
Full Spectrum Camera.
Pros:-
Flexibility over which part of the spectrum of light you use.
Changeable filters
More variety of images possible
More scope for experimentation
Cons:-
You have to have a range of filters to provide that flexbility
You have to carry more gear (filters)
You would realistically have to use an anti ultraviolet filter to use as a normal camera
The sensor picks up more red than a normal camera in many cases.
Un-adapted camera with an Infrared Filter.
Pros:-
You can use your normal camera as long as it can hold filters.
Cons:-
Long exposure times
Probably need a tripod to get the best out of it.
Effects of long exposure – blurred water, birds, clouds, trees
One final word. It is possible to convert any camera to work with infrared as a full spectrum camera. With the dedicated IR filter conversion, it would also be necessary to source a say 720 nm replacement filter – I would like to add that any conversion is best done by someone who knows what they are doing. If you are going to choose full spectrum or an un-adapted camera, you will need some method of attaching a filter, so realistically, you are probably best with a DSLR or Mirrorless camera.
I’ll show you more of my images later. Hurry back for the next installment and have a great day!