In my post, I wrote about how I fell in love with infrared photography and how for years I converted my images to very stark, contrasty black and white images. I was very pleased with them but recently, I started to see more and more infrared images that were in wonderful and strange colours. I decided to find out how these images were produced. Todays post is about some of the ways that can be achieved. One thing that I found was that there is plenty of room for experimentation and the way that I am going to demonstrate is only a starting point.
The methods that I describe involve working on RAW files in Lightroom or Camera Raw in Photoshop. You could use .jpgs from your camaera but you will have very limited control over the end product. To do what we are going to do, use the RAW files.
First you have to create a camera profile which you will need to get the best effects. Lightroom and Photoshop use Adobe Standard which gives very different results for the file that you will work on in image editing.
You will only have to create a Camera Profile once. After it has been created it will appear automatically in both Adobe Camera Raw and Lightroom if you have it.
Here is how to create your Camera Profile in Camera RAW in Photoshop:-
First, open your RAW file in Photoshop. This will automatically open up Camera Raw.

Save the file as a .dng file in a convenient place.
Next open up DNG Profile Editor. If you don’t have DNG Profile Editor you can download it from here:-
Or search online for Adobe Digital Negative – it is a free utility.
When you open DNG Profile Editor open your .dng file from where you saved it.

When it opens up, go to the color matrix tab on the right-hand side.
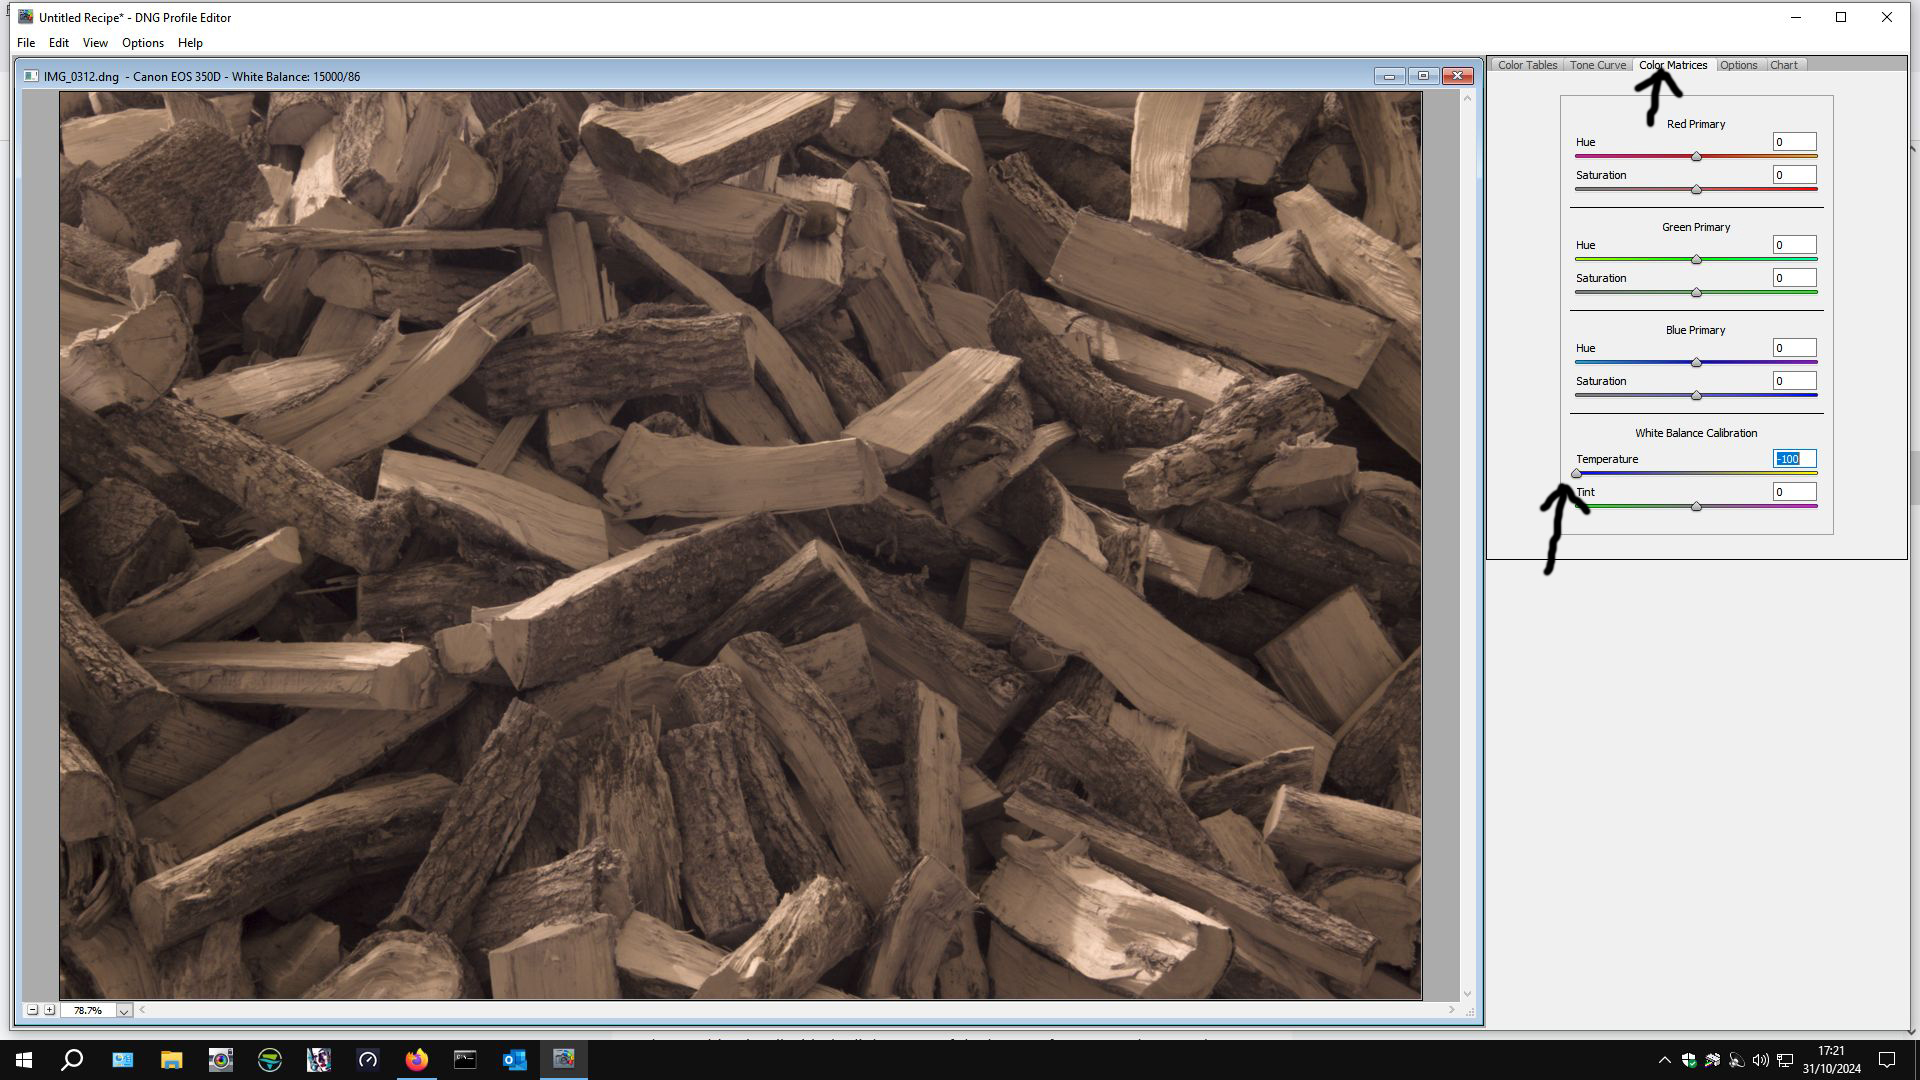
Then slide the temperature slider over to the left. Some people say to -90, others -100. I set mine at -100. Then export the profile – DNG Profile Editor will have read which camera you have used and this will form part of the profile name.
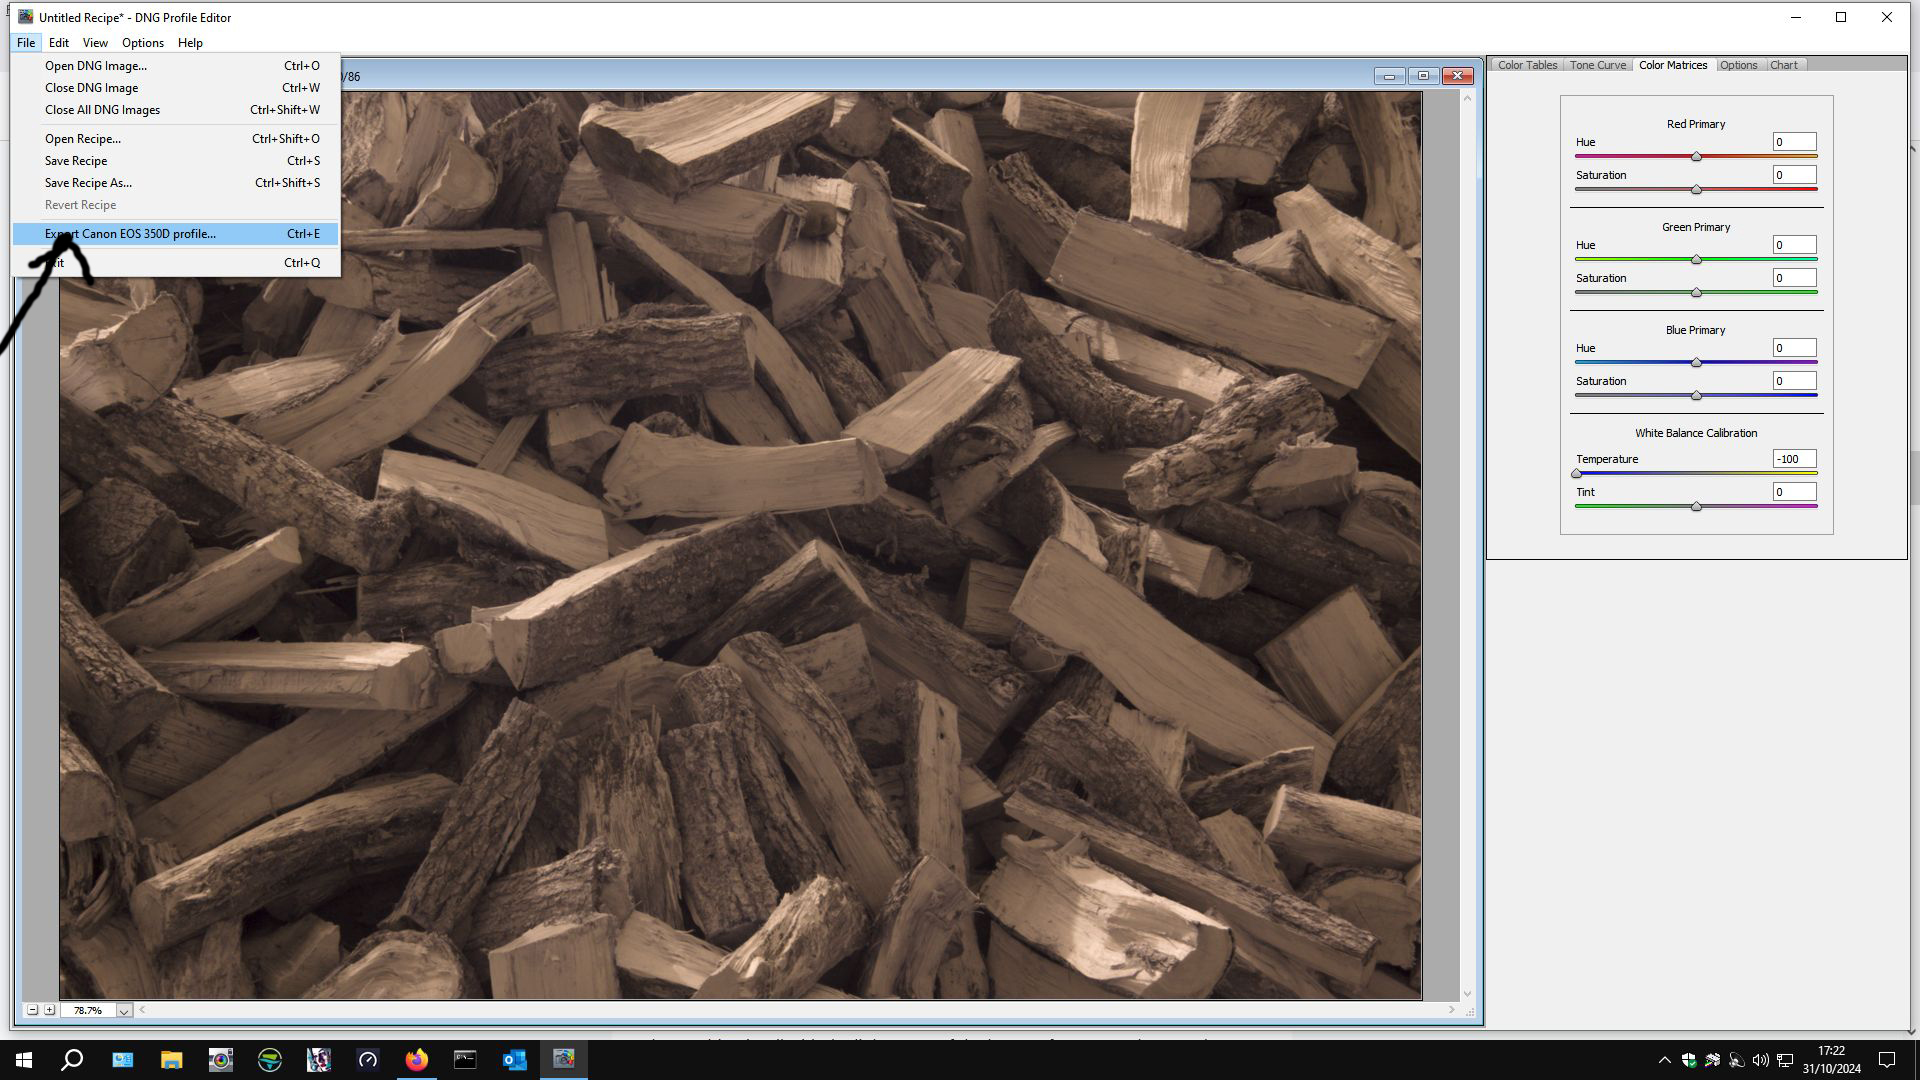
Navigate to C:\Users\<<your username>>\AppData\Roaming\Adobe\CameraRaw\CameraProfiles\ and save your camera profile in there. It comes up with a title for your profile but the middle part says “untitled”. You can customise the title – it allows for multiple profiles for the same camera to be created.
A word of caution \AppData\ is a hidden file so you may have to “show hidden files” within your file options in Control Panel. If you don’t know how to do that, there are many good online resources that will help you to do that.
If you have used Photoshop and Adobe Camera Raw, open your .dng file in Photoshop again. Camera Raw will open up again, this time go to Camera Profiles in Camera Raw (arrowed):-
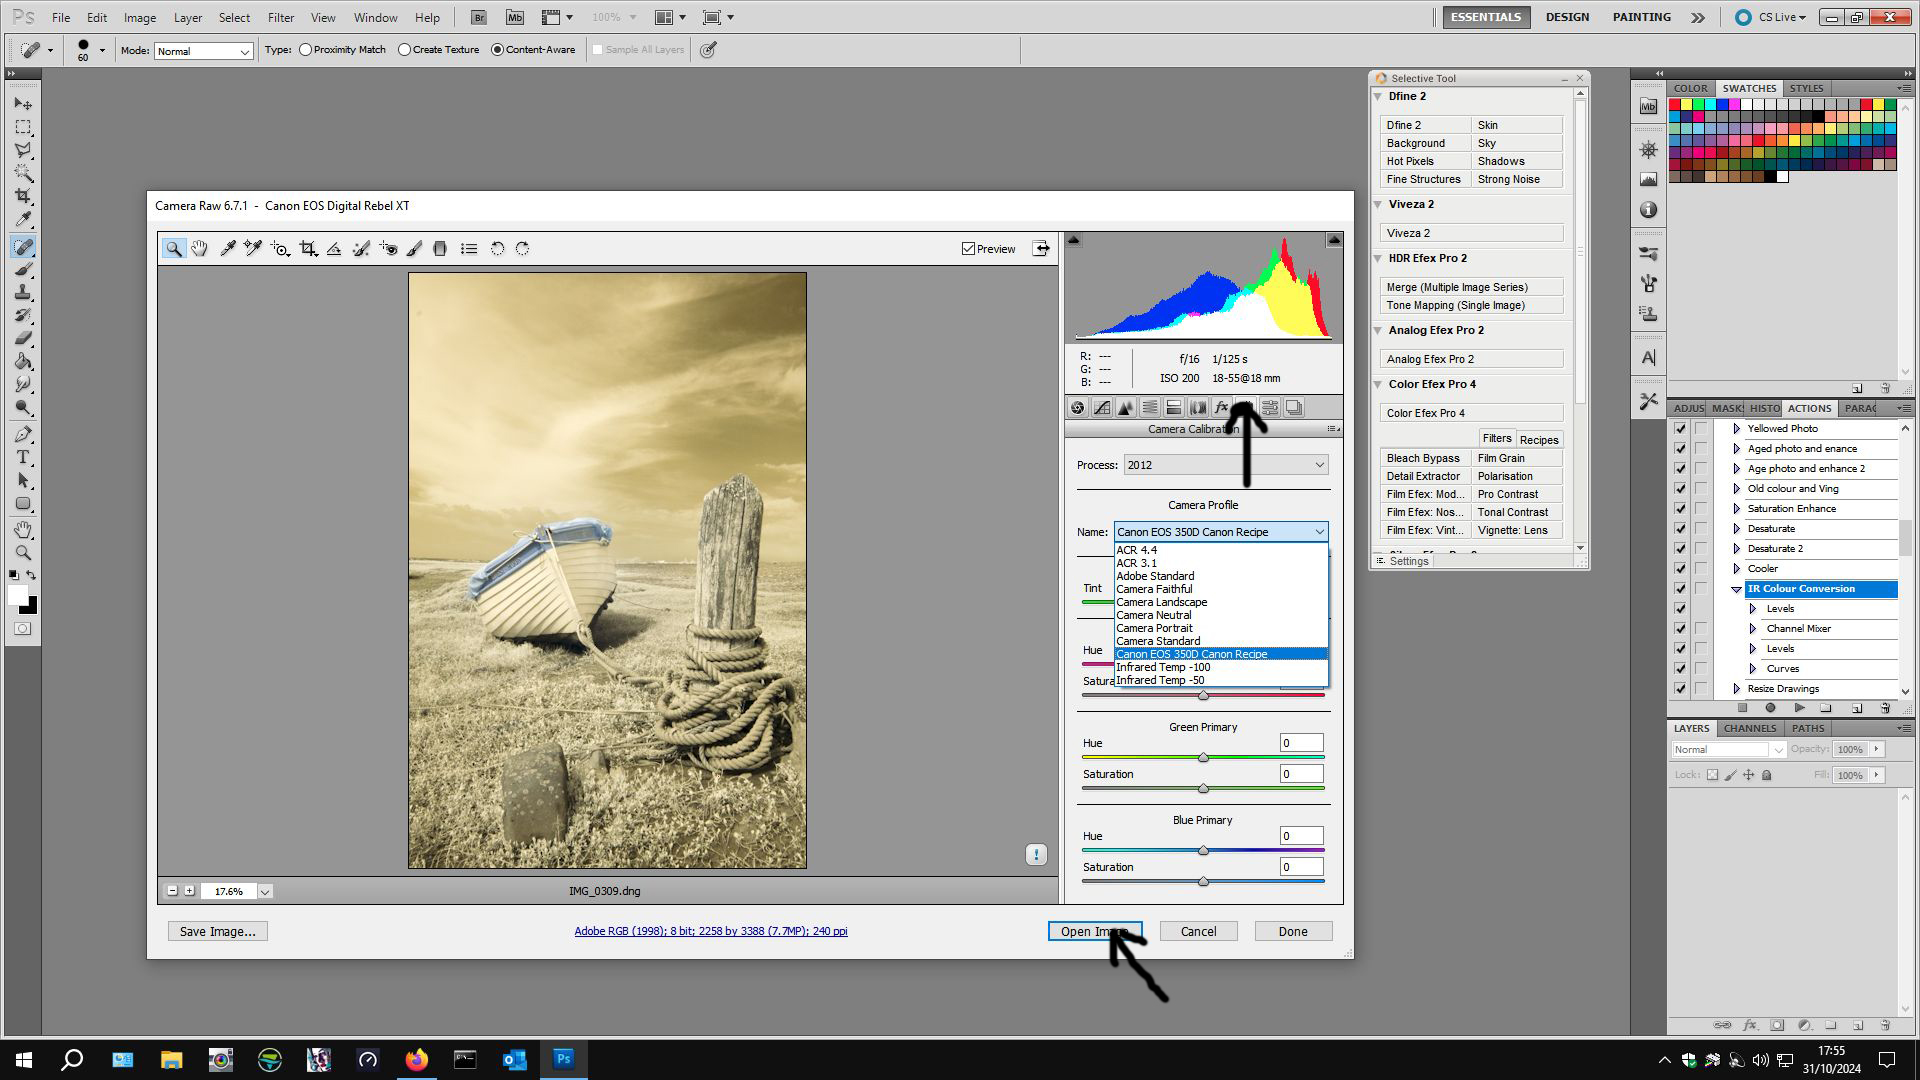
From the drop-down list click on the camera profile that you have created then click Open Image (second arrow) and your image will open in Photoshop.
Instructions for creating a Camera Profile if you use Lightroom.
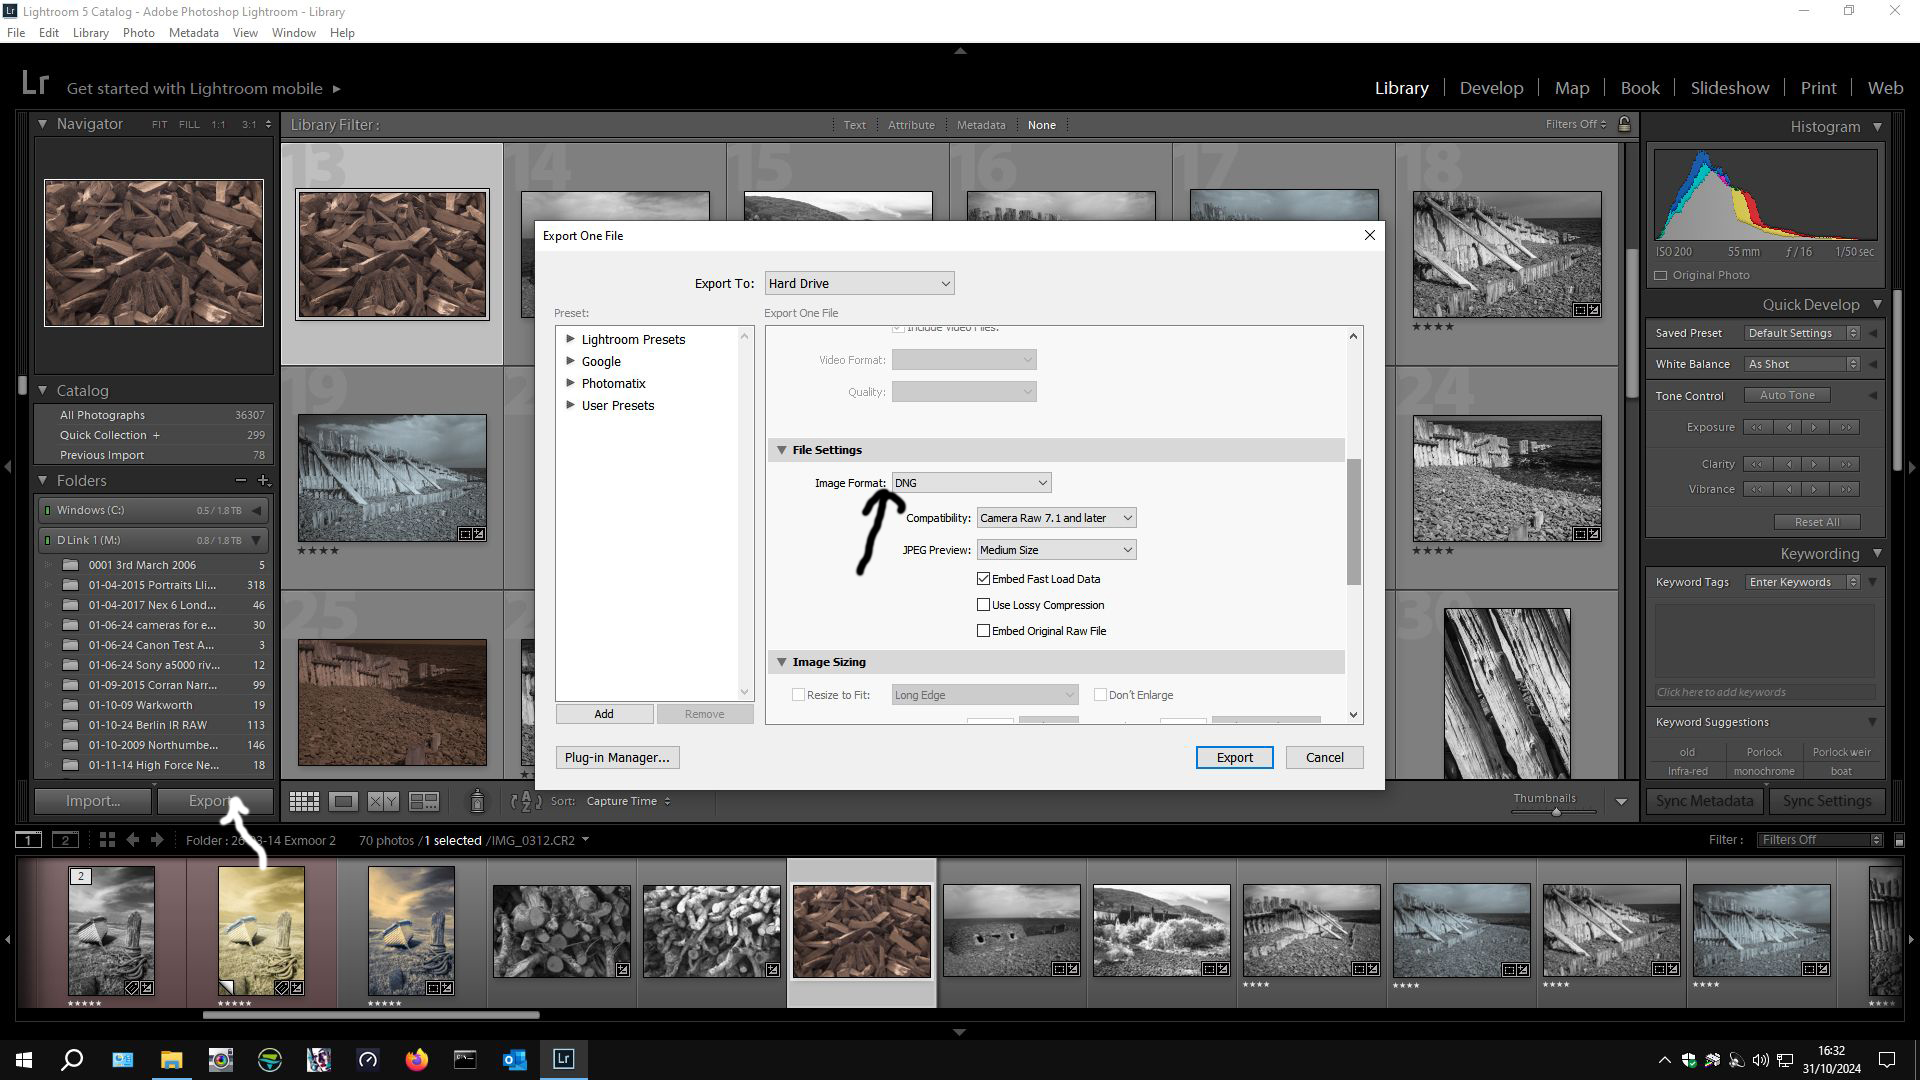
Import your RAW files into Lightroom as usual. Choose one file and export it as a .dng file and remember where you saved it to.
Then open DNG Profile Editor as before and create your Camera Profile. Restart Lightroom and then edit the rest of your .RAW files using this camera profile instead of Adobe Standard.

Camera Profile is found at the bottom left hand side (arrowed). Make whatever adjustments that you want to make – I usually click “auto” because any other adjustments can be made in Photoshop. I sometimes tweek “clarity”. If part of the image is “blown out” I adjust white levels. It is a very individual thing – this is my way, there is no one way – experiment. Then I export the file using what ever format you like. I usually export as .TIFF files at 300 dpi for best quality but if you have Lightroom, you will know how you like to export your files.
Whatever way you have created your Camera Profile, open them in Photoshop to work on them. If you have gone the Photoshop – ACR route, open your RAW file in photoshop and ACR will open, apply the Camera Profile then Open Image. The image will open in Photoshop ready to be worked on. If you went the Lightroom route, open your saved file in Photoshop ready to be worked on.
Drum Roll…..
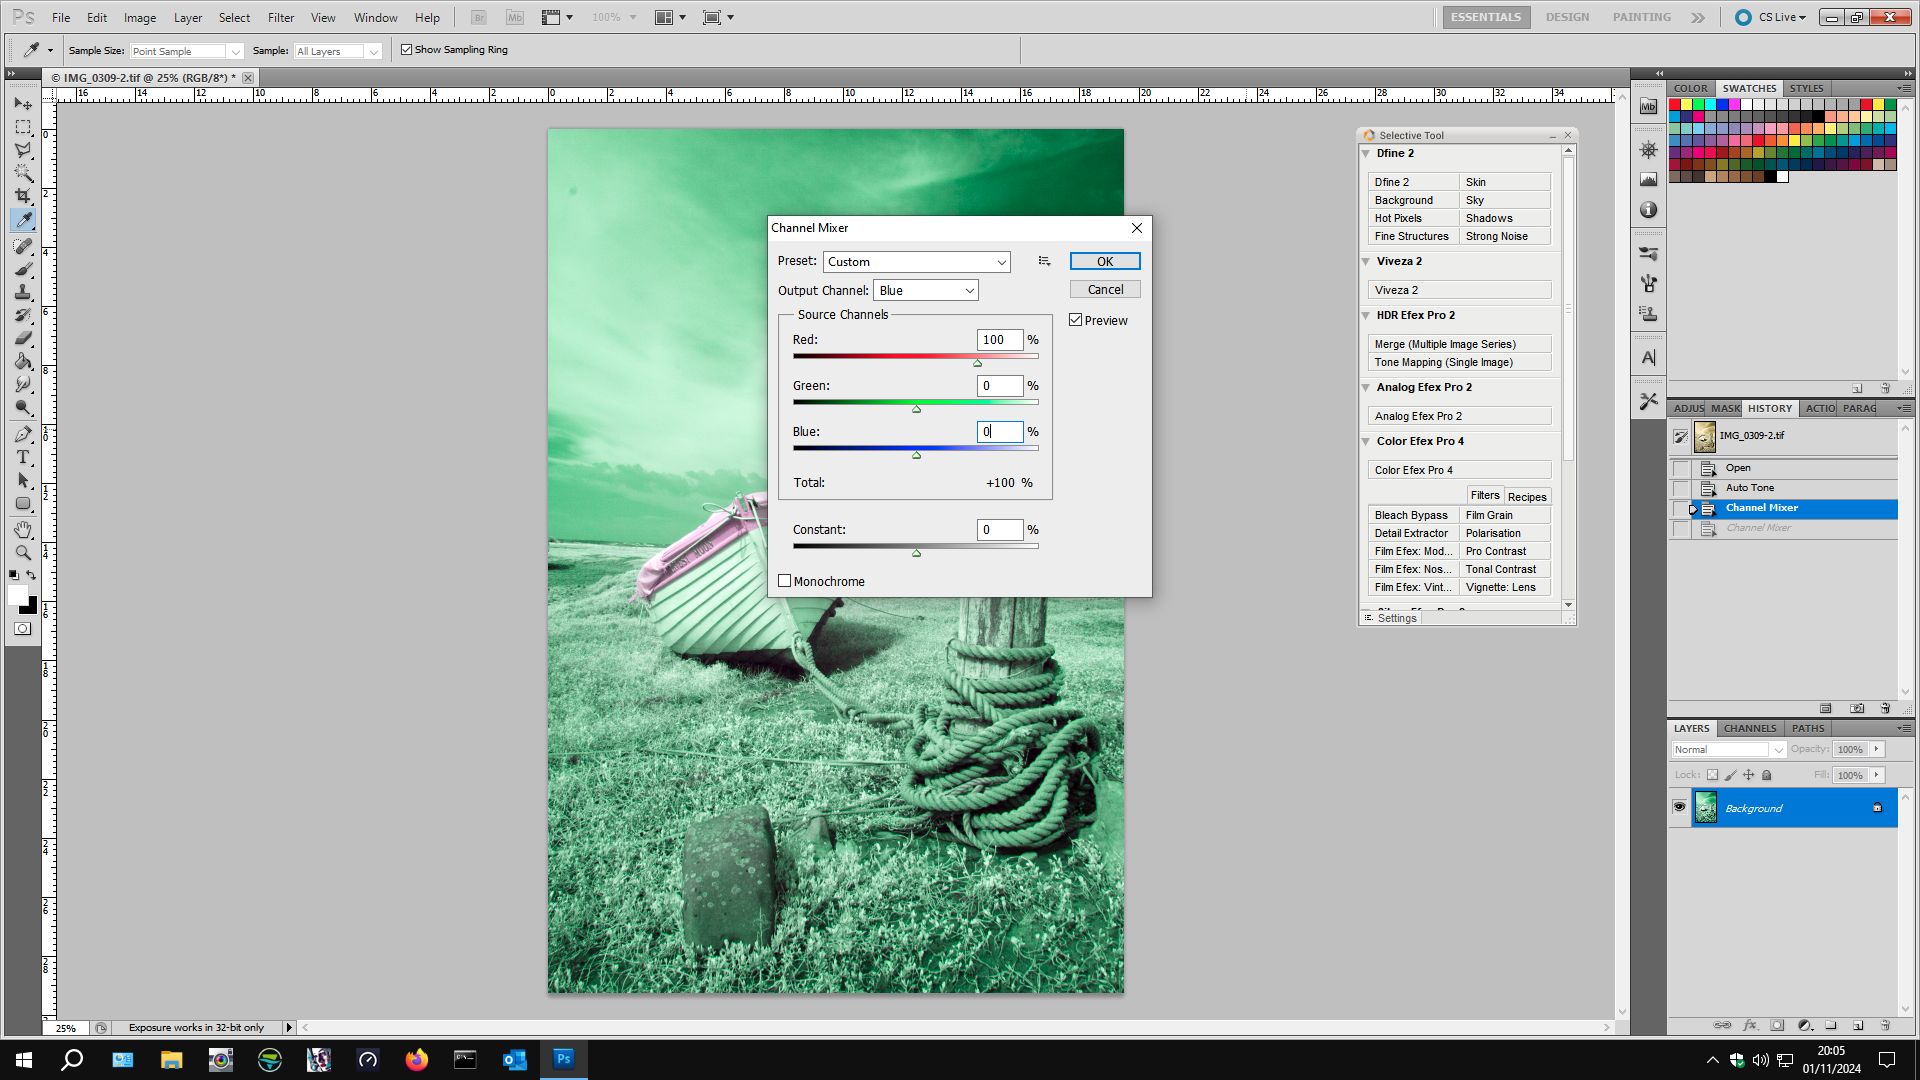
Once in Photoshop (or any other Photo editing suite capable of Channel Mixing):-
Image > Adjustments > Channel Mixer.
Select Red from the drop-down list. Slide the Red slider to 0 from 100 and the Blue slider to 100 from 0.

Select Blue from the drop-down list and move the Red slider to 100 from 0 and the Blue slider to 0 from 100. The image will turn funny colours. Click OK.
Next, open image > adjustments > levels.

Select Red from the drop-down list (Default RGB) and move the right slider to 220 from 256. Select the Blue Channel and move the middle slider to 0.70 from 1.00. Click ok.
Below is my file from Lightroom (This is how it looks when you open it from ACR too after Camera Profile has been applied).

The file that you start to work on in your image editing software will look something like this. You could convert it to black and white but we are going to give it some colour to produce something like:-
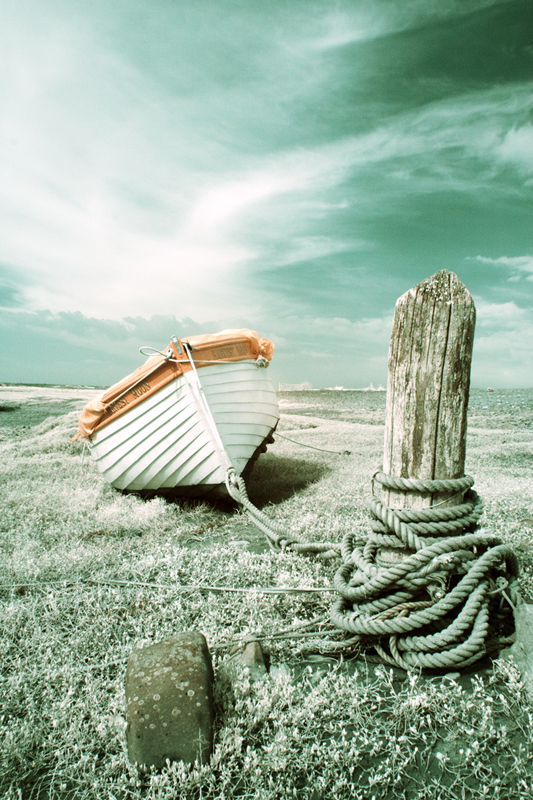
This is how this file turned out after I applied the Channel mixing and Layers adjustments described above were applied.
In addition to these basic adjustments, I also like to apply an Auto Tone before Channel Mixing and Layers adjustment to give it a bit more punch. After applying Channel Mixing and Layers, you might like to apply Curves to improve contrast (or reduce it). You could apply other basic adjustments “to taste”. One way to change the colours dramatically with “artistic effect” is to alter the Hue (image > adjustments > Hue/Saturation) – have a play by experimenting with positive and/or negative values for hue to get different effects. You might want to apply a saturation and/or brightness adjustment but I find that I get better results with Brightness/Contrast Curves, or Vibrance.

There are many ways to create coloured infrared images. This is just to get you started and it is my way, this is how I started. Internet searches will yield many ways, based more or less on this basic editing technique, to create fantastic coloured infrared images so my advice is start doing what is described here and then start to experiment with your images, search the internet for people who excel at this. A couple of names to search for:-
- Rob Shea
- Matthew Stuart Piper
Both have websites with lots of examples of excellent work.
Next Post, I will give more examples of my infrared images of which I have created coloured versions
